Displays contents of an IPM file in a user friendly format.
Syntax
$ cardak help print
usage: cardak print [<flags>] <files>...

print the contents of the file record by record

Flags:
      --help                 Show context-sensitive help (also try --help-long and --help-man).
  -v, --verbose              Add more information displayed on some commands.
      --mono                 Supress color on output.
      --ignore               Try to ignore some errors and continue processing the file
  -W, --width                Ignore small terminal width check and force execution
  -z, --silent               Suppress all output (banner, headers, summary) except the results. Specially useful for DESCRIBE command piped to a search
                             utility like fzf
  -T, --file-type=FILE-TYPE  Filter by file type when supplying several files. File types are represented by a single letter as: I-IPM files, M-MPE files
  -R, --records=RECORDS      List of record numbers to be printed. Values are separated by comma (,) and ranges are indicated by the starting and ending
                             record separated by a hyphen (-)
  -F, --fields=FIELDS        List of IPM fields to be listed (can use a filter name)
  -d, --detailed             Print detailed information showing the contents of the fields
  -s, --subfields            Show subfields contents
  -C, --code=CODE            Filter by Function Code DESCRIPTION
  -l, --last                 Use the record numbers returned on the last GREP command

Args:
  <files>  File names to print
Description
This command displays contents of IPM files in a user friendly way. It has options like filtering according to the user needs and it is a good complement to the GREP command, as it allows to display information about matching records from a previous search.
It receives as a parameter the file to view, and if no extra flag is present, it will display all records from the file, displaying by default the record number, the MTI and Function Code, and the list of present DE and PDS fields in each record.
This view alone is not very useful, especially with files with many records, so they are usually used along with flags to limit the information to output. It is also possible to redirect this output to a text file and see the contents in an external text editor.
Visualization options
The first filter we can use is the --records (-R) flag to specify a list or range of records to display. If we have previously performed the GREP command to find records, we can use instead the --last to use the records returned by that previous search.
This output still contains little information because it just lists the fields present in the record but not their values. If we want to see the values of the fields, we need to add the --detailed (-d) flag. By adding the --subfields (-s) flag it will also display the values of the subfields if present.
The amount of information displayed can grow rapidly, so we can also include the list of fields we want to see by using the --fields (-F) flag.
Another filtering option we can use in some commands like this, is the usage of the --code (-C) flag which receives a text with is part of the description of the desired Function Code.
Uses
This command is useful to quickly visualize the contents of one or more records without opening the full file. As we have already mentioned, it is a useful complement to the GREP command.
Another alternative to see record values is to use the EXPORT command and then open the exported data using an esternal program like a spreadsheet (if we export those records as a CSV file)
Examples
In its simplest form, we can see which fields are present in records 3 and 5:
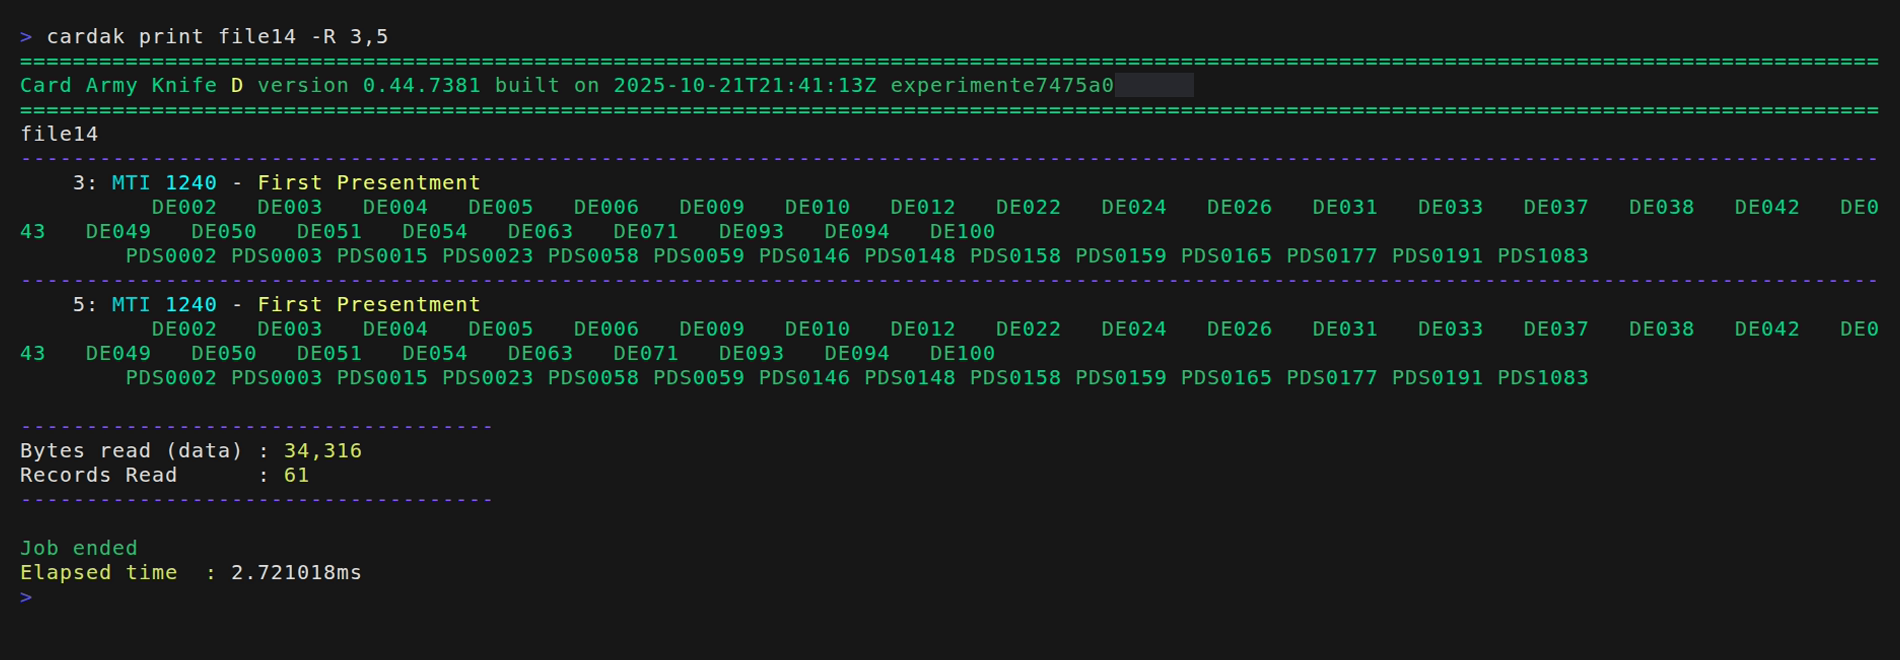
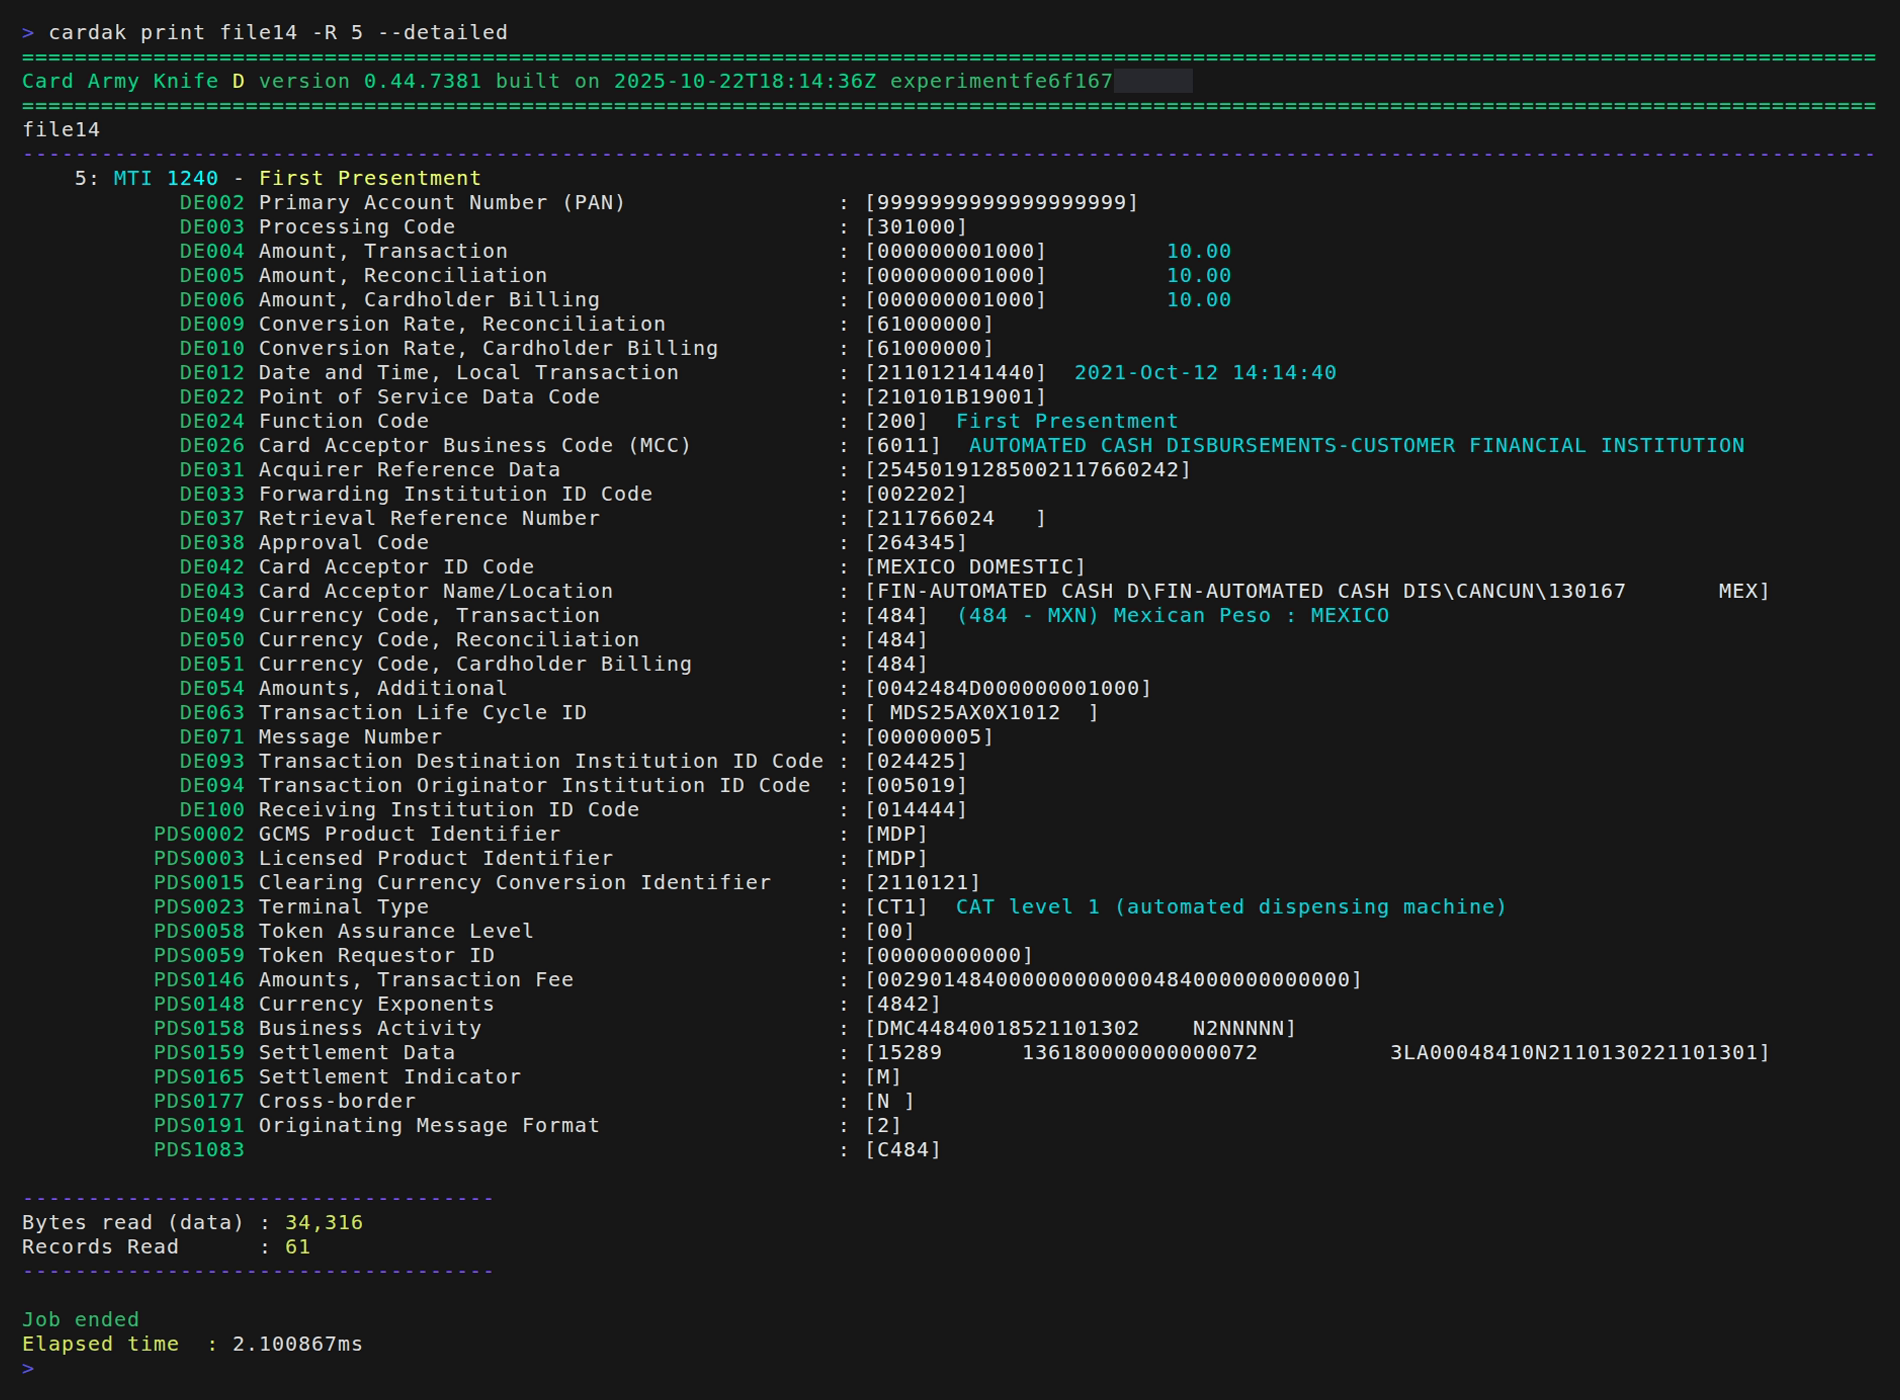
This information can be useful as we can see the MTI and Transaction Type along with the list of present fields. But if we want to see the full content of the record, we can add the --detailed flag. Let's see the full contents of record 5:
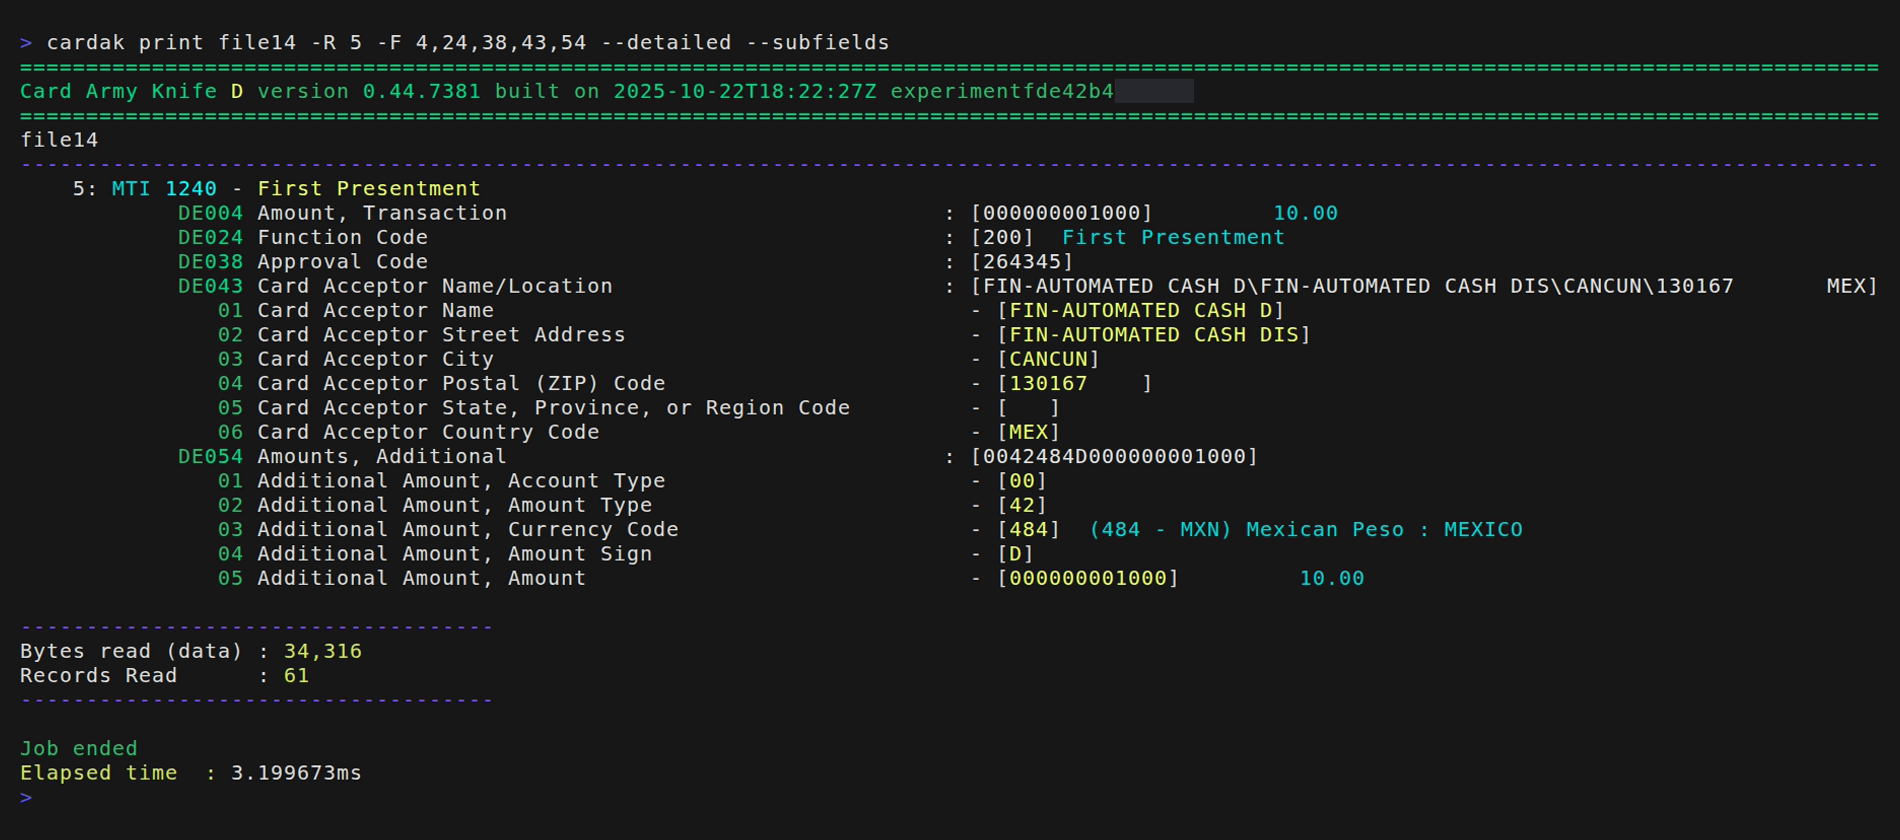
But what if we don't want to see the full record? If we just want to see some of the fields, like for example the amount (DE004), Function Code (DE024), Approval code (DE038), Location (DE043) and currency details (DE054). we can limit the output only to those fields, and also displaying the corresponding sub-fields: